-
Slack Message 발송극락코딩 2023. 8. 27. 17:35
이번에는 Slack에 Message를 발송하는 방법에 대해 정리하려고 한다. 매우 쉽고, 30분안에 만들 수 있다. Spring + Kotlin 기반으로...
가장 먼저 프로젝트 셋업
build.gradle
import org.jetbrains.kotlin.gradle.tasks.KotlinCompile

plugins {
    val kotlinVersion = "1.6.21"

    id("org.springframework.boot") version "2.7.6"
    id("io.spring.dependency-management") version "1.0.14.RELEASE"
    kotlin("jvm") version kotlinVersion
    kotlin("plugin.spring") version kotlinVersion
    kotlin("plugin.jpa") version kotlinVersion
    kotlin("kapt") version kotlinVersion
    kotlin("plugin.allopen") version kotlinVersion
    idea
}

group = "com.goofy"
version = "0.0.1-SNAPSHOT"
java.sourceCompatibility = JavaVersion.VERSION_11

configurations {
    compileOnly {
        extendsFrom(configurations.annotationProcessor.get())
    }
}

repositories {
    mavenCentral()
}

idea {
    module {
        val kaptMain = file("build/generated/source/kapt/main")
        sourceDirs.add(kaptMain)
        generatedSourceDirs.add(kaptMain)
    }
}

allOpen {
    annotation("javax.persistence.Entity")
    annotation("javax.persistence.MappedSuperclass")
    annotation("javax.persistence.Embeddable")
}

object DependencyVersion {
    const val KOTLIN_LOGGING_VERSION = "3.0.0"
    const val LOGBACK_ENCODER = "7.2"
    const val COROUTINE_VERSION = "1.6.3"
}

dependencies {
    /** spring starter */
    implementation("org.springframework.boot:spring-boot-starter-validation")
    implementation("org.springframework.boot:spring-boot-starter-webflux")
    kapt("org.springframework.boot:spring-boot-configuration-processor")

    /** kotlin */
    implementation("org.jetbrains.kotlin:kotlin-reflect")
    implementation("org.jetbrains.kotlin:kotlin-stdlib-jdk8")
    implementation("com.fasterxml.jackson.module:jackson-module-kotlin")

    /** coroutine */
    implementation("org.jetbrains.kotlinx:kotlinx-coroutines-reactor")
    implementation("org.jetbrains.kotlinx:kotlinx-coroutines-jdk8:${DependencyVersion.COROUTINE_VERSION}")
    implementation("io.projectreactor.kotlin:reactor-kotlin-extensions")

    /** logger */
    implementation("io.github.microutils:kotlin-logging-jvm:${DependencyVersion.KOTLIN_LOGGING_VERSION}")
    implementation("net.logstash.logback:logstash-logback-encoder:${DependencyVersion.LOGBACK_ENCODER}")

    /** test */
    testImplementation("org.springframework.boot:spring-boot-starter-test") {
        exclude(group = "org.junit.vintage", module = "junit-vintage-engine")
    }

    /** etc */
    developmentOnly("org.springframework.boot:spring-boot-devtools")
}

tasks.withType<KotlinCompile> {
    kotlinOptions {
        freeCompilerArgs = listOf("-Xjsr305=strict")
        jvmTarget = "11"
    }
}

tasks.withType<Wrapper> {
    gradleVersion = "7.5.1"
}

tasks.withType<Test> {
    useJUnitPlatform()
}

tasks.getByName<Jar>("jar") {
    enabled = false
}

defaultTasks("bootRun")

val Project.isSnapshotVersion: Boolean get() = version.toString().endsWith("SNAPSHOT")
이번에는 코루틴 기반으로 Thread-Non-Blocking하게 진행할려고 한다.
/** coroutine */
implementation("org.jetbrains.kotlinx:kotlinx-coroutines-reactor")
implementation("org.jetbrains.kotlinx:kotlinx-coroutines-jdk8:${DependencyVersion.COROUTINE_VERSION}")
implementation("io.projectreactor.kotlin:reactor-kotlin-extensions")
gradle Setup이 끝났다면, Slack 설정을 진행해줘야 한다.
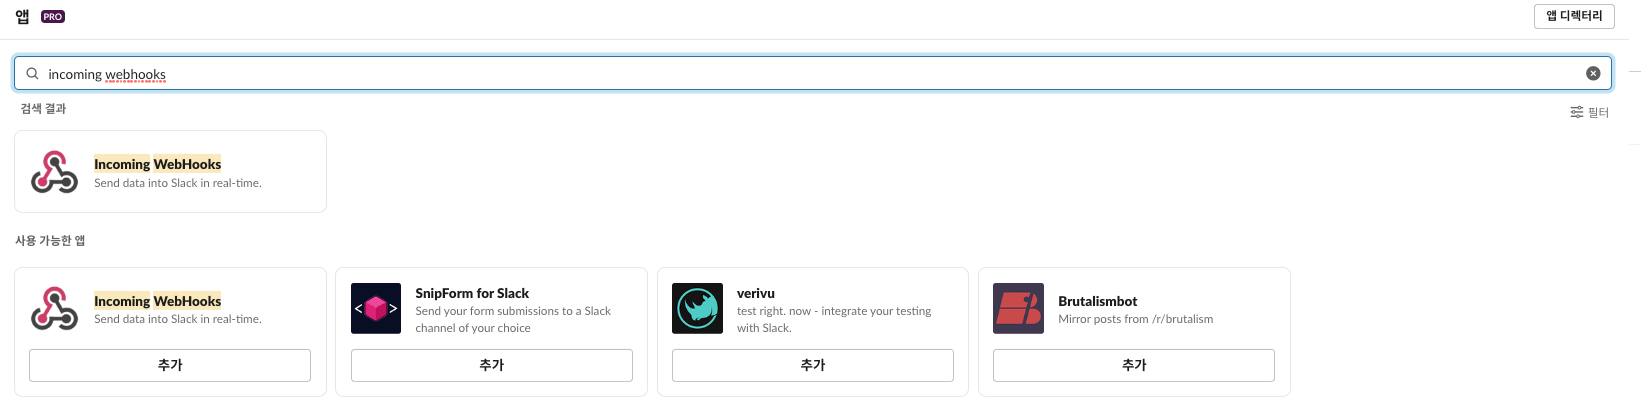
Slack App을 연다음에 앱 추가에서 Incoming WebHooks를 선택
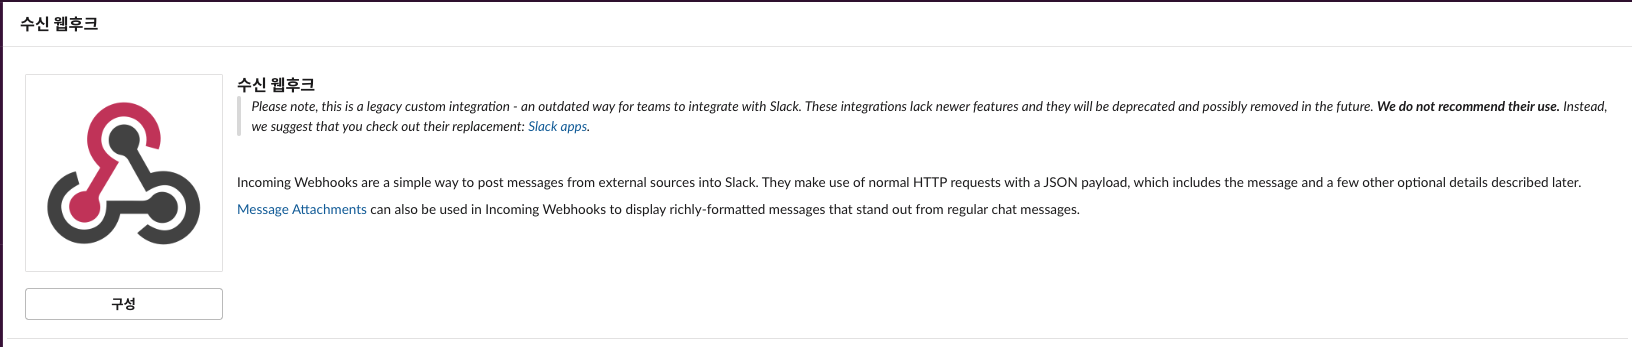
구성에 들어가면,
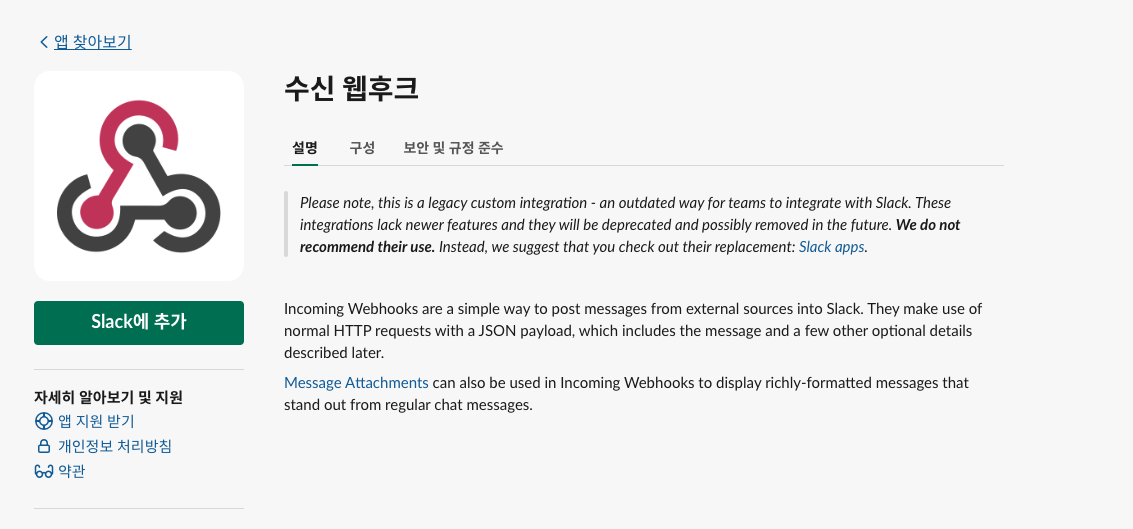
아래와 같은 웹 화면이 뜰거고, Slack에 추가를 클릭!
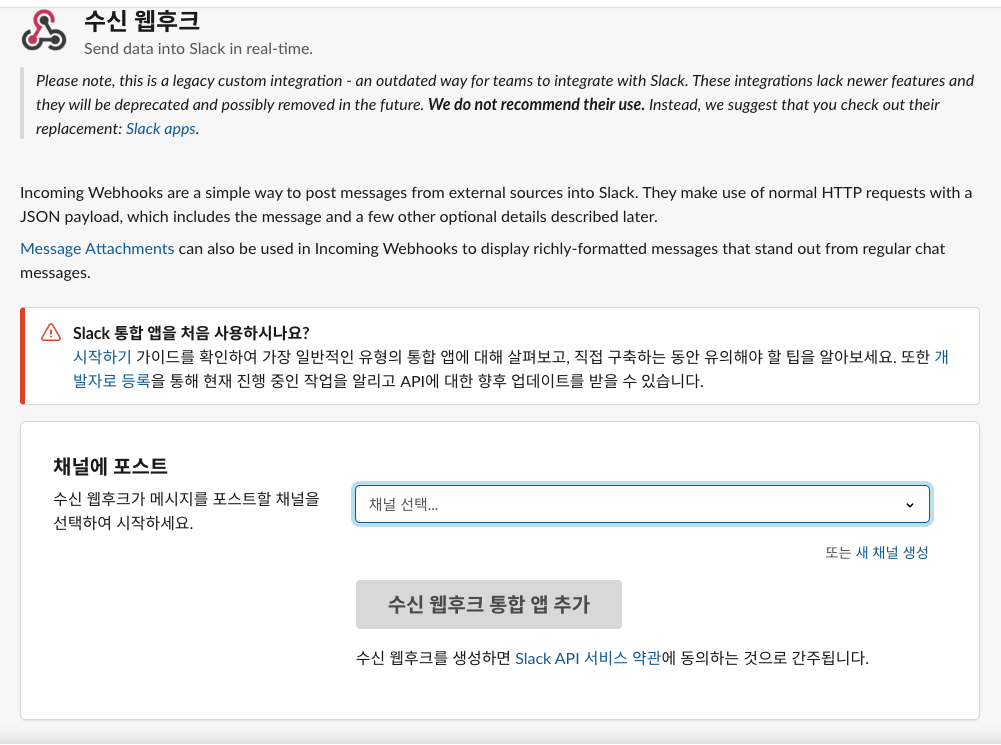
채널에 포스트 부분에서, 슬랙 메세지를 발송할 채널을 선택한다.
채널 설정 후에, 구성 부분에 대한 편집을 진행한다.
우리에게 중요한건.. 다음과 같다.
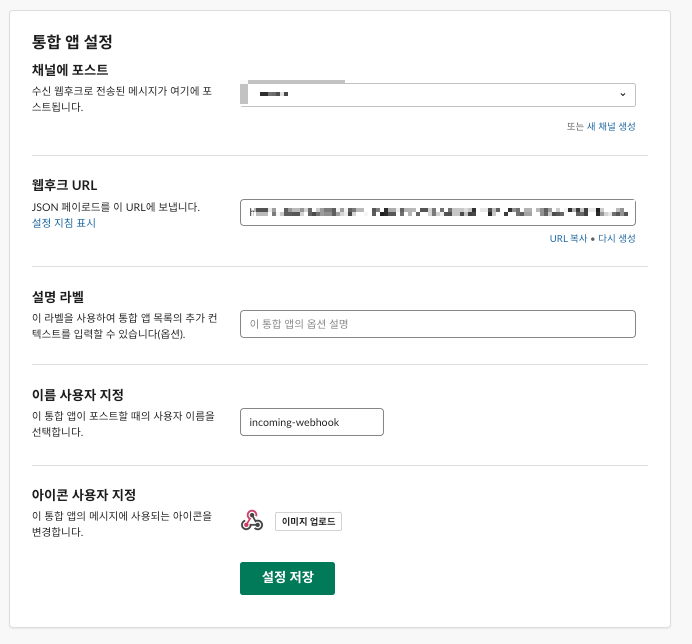
채널에 포스트 : 어떤 채널에 발송할 것인지
웹후크 URL : 이부분이 정말 중요한데, 슬랙 webhookUrl + token으로 구조가 되어있기 때문에 외부 유출에 유의!
설명 라벨 : ,, 할필요 없음
아이콘 사용자 지정 : 슬랙 알림이 진행될 떄 프로필 이미지다.
위의 설정만 잘 파악해두자!
(웹후크 URL을 복사해서 가지고 있자.)
여기까지 잘 따라왔다면, 슬랙 설정까지 끝난 것이기 때문에 80%는 끝난 거임
다음으로는 코드레벨에서 개발을 진행한다.
먼저, 위에서 발급받은 webhookUrl을 관리할 Properties를 구성한다.
application.yml
slack:
  webhooks:
    test1: # key is your choice
      url: # that's webhook url - exclude https://hooks.slack.com/services
    test2: # key is your choice
      url: # that's webhook url - exclude https://hooks.slack.com/services
여러 webhook을 받을 수 있도록, Map 구조로 application.yml을 구성한다. (근디 이건 쓰는 사람의 선택..)
중요한건, url 항목의 토큰 값을 무조건! 안전한게 별도로 관리!
SlackProperties.kt
@Validated
@Configuration
@ConfigurationProperties(prefix = "slack")
class SlackProperties {
    @field:NotEmpty
    var webhooks: Map<String, WebhookModel> = emptyMap()

    fun getWebhookModel(key: String): WebhookModel {
        return webhooks[key] ?: throw NotFoundSlackWebhookModelException(key)
    }
}

@Validated
data class WebhookModel(
    @field:NotEmpty
    var url: String = ""
)
webhookUrl을 관리하는 Properties 파일..
여기서 NotFoundSlackWebhhokModelException은 다음과 같이 구성했음
class NotFoundSlackWebhookModelException(key: String) :
    RuntimeException("There is no data registered as the key[$key] value")
이것도 본인이 생각하는 거에 맞춰서 구성하면 될듯..
다음으로는 SlackClient를 만들어보자!
SlackClient.kt 를 작성한다.
interface SlackClient {
    /**
     * if you success to message, then return "ok"
     */
    suspend fun send(webhookModel: WebhookModel, slackMessageModel: SlackMessageModel): String

    /**
     * support sending multiple messages, *Use after checking for overload*
     */
    suspend fun sendBulk(webhookModel: WebhookModel, slackMessageModels: List<SlackMessageModel>)
}
나의 경우에는, 2개의 메서드를 만들었는데, 하나는 단건으로 메세지를 보내는 것, 그리고 하나는 다건으로 메세지를 보내는 건이다.
WebhookModel은 위에서 만든 Properties에 있는 클래스이고, SlackMessageModel은 다음과 같다.
data class SlackMessageModel(
    /**
     * Enter a message to be sent to Slack.
     */
    val text: String
)
이번에 사용하는 Webhook의 Request는 text 필드로 보내도록 되어 있기 때문에 다음과 같이 Model 구조를 잡았음.
다음으로는 실제로, Slack에 메세지를 발송하는 Client 구현체를 작성해보자.
class SuspendableSlackClient(
    private val webclient: WebClient
) : SlackClient {
    override suspend fun send(webhookModel: WebhookModel, slackMessageModel: SlackMessageModel): String {
        return withContext(Dispatchers.IO) {
            webclient
                .post()
                .uri(webhookModel.url)
                .contentType(MediaType.APPLICATION_JSON)
                .bodyValue(slackMessageModel)
                .retrieve()
                .awaitBody()
        }
    }

    override suspend fun sendBulk(webhookModel: WebhookModel, slackMessageModels: List<SlackMessageModel>) {
        slackMessageModels.forEach { slackMessageModel ->
            coroutineScope {
                launch(Dispatchers.IO) { send(webhookModel, slackMessageModel) }
            }
        }
    }
}
각각의 Method 들은 모두 Dispatcher.IO 안에서 작업이 진행되도록 구성하였다.
차이점이라고 하면, send()의 경우에는 반환값을 받을 수 있도록 일시 중지될 수 있다. 그런데 sendBulk의 경우에는 coroutineScope안에서 launch되어 반환값을 반환받지 않고, 스레드안에서 흘러가도록 구성하였다.
bulk로 보내는 메세지의 경우에는 중간에 suspend되는게 비효율적이라고 판단해서 다음과 같이 작성하였다.
다음으로는 SlackConfig 파일에 대해서 보겠다. 위의 코드들을 합쳐주는 역할을 진행한다.
@Configuration
class SlackConfig {
    private val logger = mu.KotlinLogging.logger {}

    companion object {
        private const val SLACK_WEBHOOKS_DOMAIN = "https://hooks.slack.com/services"
    }

    @Bean
    fun slackClient(): SlackClient {
        val webClient = WebClientExtension.generate(baseUrl = SLACK_WEBHOOKS_DOMAIN)
        logger.info { "initialized slack client" }
        return SuspendableSlackClient(webClient)
    }
}
webClient를 만들어서 SuspendableSlackClient를 Bean으로 등록해주는 역할을 진행한다.
여기서 WebClientExtension과 MapperExtension에 대해서는 아래의 깃허브 레포를 통해 확인하면 될 것 같다.
(전체 코드는 공유되어 있다.)
위의 모든 과정을 순조롭게 따라왔다면, 모든 개발은 거의 끝난 것이다. 그럼 테스트를 진행해보자.
다음과 같이 Test를 위한 Controller와 Service를 구성했다.
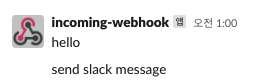
@RestController
class SlackResource(
    private val slackService: SlackService,
) {
    @GetMapping("/api/v1/slack")
    suspend fun sendMessage() = slackService.sendMessage()

    @GetMapping("/api/v1/slack-bulk")
    suspend fun sendBulkMessages() = slackService.sendBulkMessages()
}

@Service
class SlackService(
    private val slackClient: SlackClient,
    private val slackProperties: SlackProperties,
) {
    suspend fun sendMessage(): String {
        val webhookModel = slackProperties.getWebhookModel("test1")
        val slackMessageModel = SlackMessageModel("send slack message")

        return slackClient.send(webhookModel, slackMessageModel)
    }

    suspend fun sendBulkMessages() {
        val webhookModel = slackProperties.getWebhookModel("test2")
        val slackMessageModels = (0..50).map { count ->
            SlackMessageModel("send slack message - $count")
        }

        slackClient.sendBulk(webhookModel, slackMessageModels)
    }
}
Slack Test-단건
Slack Test-다건

다건 발송의 경우, 비동기로 작업이 진행되고 순서를 보장하지 않도록 구성하였기 때문에, 순서가 전부 다르는 것을 확인할 수 있다.
자 이제 끝이다. 직접 구성해보면서 실습을 진행해보자~@~!@@!~@!@ 극락
Reference
'극락코딩' 카테고리의 다른 글
API Latency를 줄이는 방법 (Part. 1) (0) 2023.08.29 API Latency를 줄이는 방법 (Part. 0) (0) 2023.08.28 @Transactional vs TransactionTemplate (0) 2023.08.22 온디맨드가 뭔디? (1) 2023.08.20 Redis Pub-Sub 사용하기 (0) 2023.08.19